 | |
| The description that follows is for brown rabbit on the right |
Since I first made my totoroid breakfast companion, I've made quite a few more, ranging from conical, through cylindrical to round, as shown. Now I decided to redo the description in a somewhat more precise manner. I was writing things down as I went along, so that you can see the exact result.
First, you find some remains of the yarn. You don't need a lot (you can make the design smaller or bigger as you go along, so, I dunno, about 30 g of thin-ish yarn, like 250 m in 100 g). Find five appropriate size double-point needles. Appropriate size in this case means that you obtain knitting substantial enough that the stuffing doesn't show.
Cast on 6 stitches the way you like it best. Distribute between three needles, start knitting in rounds, first round all-knit.
Second and two more rows - make two stitches out of each edge stitch on each needle, any way you like it (this is the base of the toy, not particularly visible). With each row you will increase the number of stitches by 6 - 2 for each needle. The base will start looking like a triangle. When you arrive at 8 stitches on each needle, start adding two extra stitches in the middle of each needle every second row. Example, the first needle of the 5th row : You have 8 stitches, make two out of the first one, knit 2, make two, make two, knit two, make two, you now have twelve on the needle. Every one of such rows will increase the overall amount by 12 (4 stitches increase on each needle). Every second round is knit the same way as before - making two out of every edge stitch, overall increase of 6. Adding stitches in the middle will make the triangle rounded.
 |
| You can see the middle-needle increases puckering |
I knitted in this fashion till I had 30 stitches on each needle. You can stop earlier, of course. The toy will be smaller, but the whole thing is very modifiable anyway.
Now, to make a little tail. This is optional, obviously, but I found it helped my to keep track of which needle I was on. You end each row when you are at the tail. I don't have markers or counters - am not that organized.
Knit two stitches of the next round. Slip the last two stitches of the last round onto the other end of your working needle. You now have four stitches on it. This is where your fifth needle comes into play. Make 4-stitches i-cord, 6-7 rows of it.

Now, put the stitches of the i-cord back where they belong, returning 2 stitches on both right and left needles. The i-cord will be folded double in process. This is the tail.
This is the best point to pick up the loose end that is left after casting on. Pull the yarn tight, closing the middle hole if there is one, thread it into a sewing needle, make a half-hitch knot to fasten the yarn, make a loose seam to the bunny tail and close any holes that might have formed by sewing them together. Make a half-hitch knot and cut the end keeping it on the reverse side.
Start knitting the lower, cylindrical part of the toy's body, without increases or decreases. Knit 10 rows.
Start decreasing.
I made each decreasing row by knitting two together twice on each needle. That's minus 6 stitches per row. Important (I think) - don't make your decreases every time in the same place, otherwise your rabbit will get a very geometrical look. Unless that is what you want. Do, however, make your decreases regular within the round. For example, the first decreasing row can be made as follows:
We have 30 stitches on each needle and we are making one "knit two together" per 15 stitches.
Knit (any number of stitches between zero and 13, i.e. not going past the middle of the needle, but for simplicity let's say) 5, knit two together. *Knit 13, knit two together*, Repeat the bit between the ** till you run out of stitches. Next decreasing row will be done similarly, but instead of knitting 13 you will do 12 (one "knit two together" per 14 stitches). Do start in a different place, though.
 |
| Starting to decrease |
Make one decreasing row, 3 rows all-knit, one decreasing. 2 rows all-knit; after that each decreasing row is followed by one all knit row till you are left with 8 stitches on each needle.
Stuff your toy. I use hollowfiber, you can use what seems best.

Knit four stitches.
Re-distribute the stitches between the four needles as follows: 8 at the back (above the tail, yes, 4 to each side of it), four each side to make ears, 8 in the front.
Make the first ear by knitting 12-14 rows of 4-stitch i-cord on the "side needle".
 |
| This is my toy, but you can make it shorter or longer |
Cut the yarn leaving enough to finish the toy. I left about a meter of tail, being nervous that I would run short, which I didn't. I think half of it would have been enough.
Pull the yarn though all four stitches. You can use a crochet hook. Thread the tail into a sewing needle with a big eye, and make a half-hitch knot at the end of the ear to fasten. With the needle, pull the yarn though to the base of the ear. Try to stay in the middle hollow of the i-cord. If you accidentally go out of the ear too early, pull the whole thing out and start again.
Make a half-hitch knot at the base to fasten, use it to bring the base of the ear together.

Bring the front and back needles close together and cast off using one stitch of each needle with each step of cast off. (You can also graft, if you wish to remove the resulting seam)

I find it is easiest to slip one stitch off the back needle to the front one for each step of casting off.

When you've finished casting off, first knit the remaining stitch together with the first stitch on the side needle. Now make the second ear by making i-cord of the same (or indeed different) length. Pull the yarn though all four stitches. Thread it into a needle. Make a half hitch. Return to the base of the ear, close any holes, make another half hitch, stick the needle though the stuffing, pull through and cut the yarn flash to the body, thus loosing the end in the stuffing.
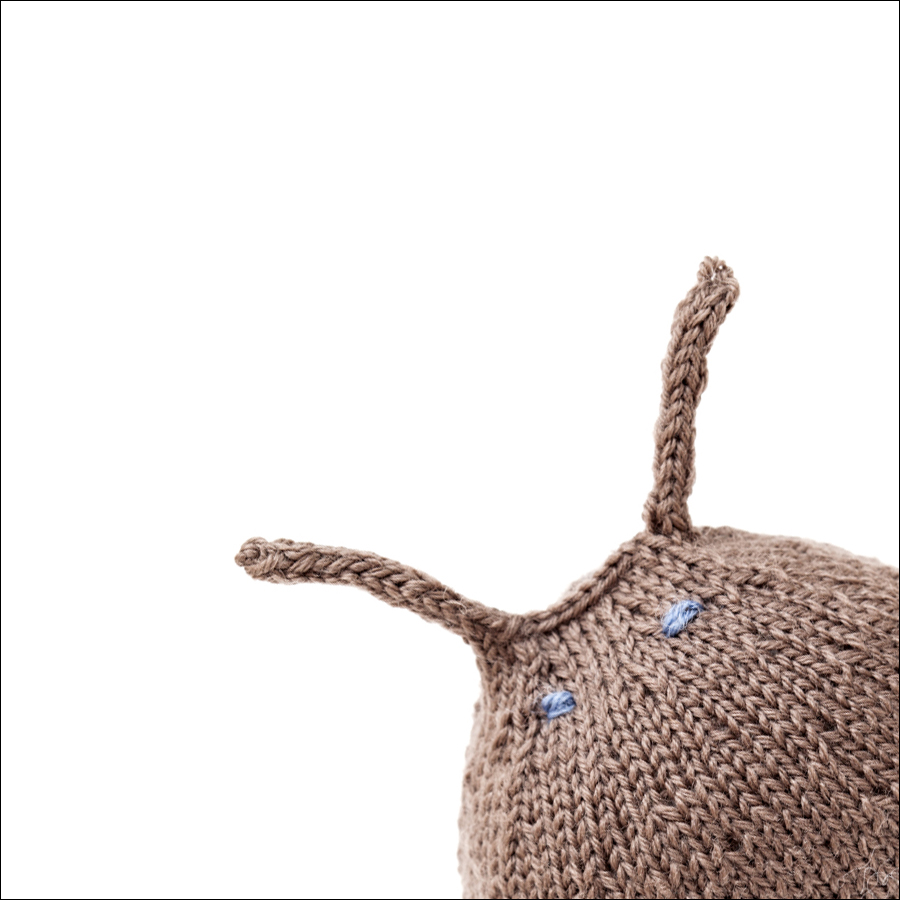
 |
| Knitting part of the project complete |
The eyes can by made by embroidery, as shown, or you can use buttons or what have you.
 |
| Base, tail down :) |
To make your rabbit extra smart you can give him a pair of glasses.

Link to ravelry page in case you want to "like" it there
Enjoy :)
Краткое описание кролика на русском (упражнение такое):
Потребуется немного пряжи (количество зависит от того, какого размера нужен полученный звер, у меня тут граммов тридцать сравнительно тонкой шерсти), немного же набивки, пять чулочных спиц, иголка с большим ухом и проволока для очков, если вам нужен ну очень умный кролик.
Набираем 6 петель, оставив некоторый хвост - см 20 примерно. Распределяем на 3 спицы, замыкаем в кольцо, провязываем первый ряд. Весь кролик связан лицевыми петлями.
Прибавляем в каждом ряду по одной петле с каждого конца каждой спицы (6 петель прибавки на ряд). Получается треугольное донышко. Когда дошли до 8 петель на каждой спице - начинаем вдобавок еще прибавлять по две петли в середине каждого второго ряда. Это скругляет форму. В каждом таком ряду прибавляется 12 петель на ряд.
Я вязала, пока не оказалось 30 петель на каждой спице. Можно остановиться гораздо раньше, конечно.
Провязываем две петли, снимаем на рабочую спицу две петли предыдущего ряда. На спице четыре петли. Используя пятую спицу, вяжем дуршнур из 6-7 рядов. Это будет хвост. Заодно это будет маркер конца ряда.
Снимаем две петли на правую спицу, возвращая их по месту жительства. Хвост при этом складывается в петельку.
Вправляем свободный конец пряжи (оставшийся от набора) в иголку, закрепляем нитку, стягиваем дырку в центре, если она есть, закрепляем нитку, свободно, не стягивая, делаем несколько стежков по изнанке к хвосту. Иголкой собираем основание хвоста в более тугую петлю, заодно закрывает все дырки, если они есть. Остаток нитки оставляем с изнанки.
Вяжем 10 рядов не убавляя и не прибавляя.
Начинаем убавки.
Убавочный ряды - по 6 петель убавки (две вместе лицевой) на ряд, 2 убавки на каждой спице. Распределяем убавки равномерно внутри ряда, но не делаем их в одном и том же мести, иначе будут образовываться "стрелки".
Убавочный ряд, три ряда просто так, убавочный ряд, два ряда просто так, с этого момента чередуем убавочные и простые ряды, пока у нас не окажется 8 петель на спицу.
Вяжем четыре петли и перераспределяем петли: 8 сзади (по четыре с каждой стороны от хвоста, видите, как хорошо, что у него есть хвост?), 4 слева и справа для ушей, 8 спереди.
Набиваем игрушку чем есть.
Следующая в работе должна оказаться "боковая" спица с четырьмя петлями. На них вяжем дуршнур - тут 12-13 рядов, но можно больше или меньше, конечно. Обрезаем нитку, оставляя длинный хвост, чтобы закончить игрушку. Я перестраховалась и оставила аж метр, думаю, половины бы хватило.
Вставляем хвост в иголку, закрепляем, "спускаемся" иголкой в основание уха. Задача попасть во внутреннюю полость дуршнура или хотя бы не выходить наружу уха. Если все-таки вышли - вытащите все назад и начните снова.
Закрепить нитку в основании, заодно закрыв дырки, если они образовались.
Сводим вместе переднюю и заднюю спицы (8 петель на каждой) и закрываем их вместе. При обычном закрытии провязывается вместе две петли, в данном случае три - одна сзади, одна спереди. Образуется шов косичкой. Если не хочется очевидного шва - можно соединить петли трикотажным.
Если соединяли петли закрытием - провязываем оставшуюся петлю и первую с последней спицы вместе лицевой. Осталось четыре петли.
Вяжем дуршнур второго уха, протягиваем нитку сквозь все петли, закрепляем, продеваем в иголку, спускаемся к основанию, укрепляем, прячем хвост в начинке. Дальше как угодно украшаем кролика - делаем глаза (ну как-нить), очки.
Можно ему еще жилет и карманные часы, конечно :)
ПРИШЛА В ВОСТОРГ ОТ ВАШИХ ЗАМЕЧАТЕЛЬНЫХ ЗАЙЧИКОВ/КРОЛИКОВ! СУПЕР ИДЕЯ! :)
ReplyDelete;)
Delete